In this tutorial, you will learn to start, uninstall, and install VSCode on Ubuntu. Microsoft’s Visual Studio Code (VSCode) is a source-code editor developed for Windows, Linux, and macOS. The code editor supports debugging, syntax highlighting, automatic code completion, snippets, embedded Git control, etc.
VSCode is open source. It supports an abundance of extensions and acts as a version control system, thus facilitating project collaboration.
What you’ll learn
- How to install VSCode
- How to update ubuntu
- Some basic configuration
What you’ll need
- Ubuntu Desktop
- Sudo-privileged user account
- Basic Linux command line knowledge
Install VSCode on Ubuntu
There are many ways to install the VSCode on Ubuntu. VSCode can be installed with the help of the following methods:
- Install VSCode using Ubuntu Software
- Install VSCode using Snap
- Install VSCode using Flatpak
- Install VSCode using apt
- Using the .deb/.rpm packages
But here we are going to use the best and fastest way to install the VSCode on Ubuntu. So following way is the best way to install Visual Studio Code on Ubuntu:
Install VSCode using apt
Update your Ubuntu
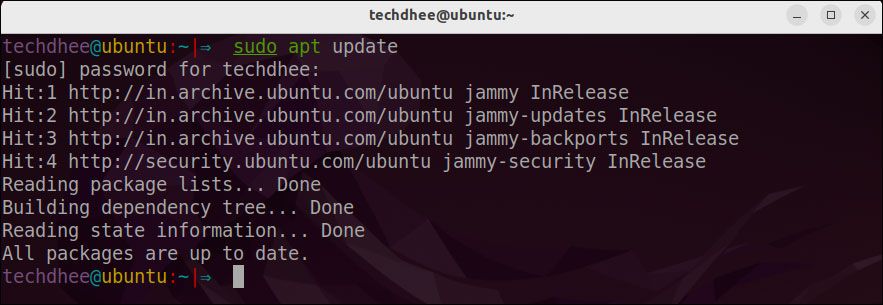
Before installing the VSCode, we have to update the ubuntu repositories by the following command:
$ sudo apt update
Install-Package Dependencies
For proper operation, VSCode requires you to install package dependencies. Run the following command to resolve package dependencies:
$ sudo apt install software-properties-common apt-transport-https wget -y
The command automatically installs any VSCode dependencies.
Add GPG Key
Import the GPG key provided by Microsoft to verify the package’s integrity. Enter:
$ wget -q https://packages.microsoft.com/keys/microsoft.asc -O- | sudo apt-key add -
Add Repository
Run the following command to add the Visual Studio Code repository to your system:
$ sudo add-apt-repository "deb [arch=amd64] https://packages.microsoft.com/repos/vscode stable main"
Install VSCode on Ubuntu
You can install VSCode using the following command:
$ sudo apt install code
Once you are done with the installation, we have successfully installed VSCode using Ubuntu’s terminal.
Open the VSCode
Now your VSCode is installed in your Ubuntu. You can open it using Terminal or using the Ubuntu Activities bar.
Using Terminal
$ vscode
Using the Activities bar in Ubuntu
Simply go to Activities and search for VSCode, you should be now able to see the VSCode icon, click on it to launch VSCode.
Verify Installation
Verify VSCode installation by running:
$ code --version
If the installation was successful, the output shows the program version.
This is the way how you install VSCode on Ubuntu 22.04 and now you can use this VSCode for editing the files on Ubuntu.
Video
You can watch this video on how to install Visual Studio Codeon Ubuntu 22.04 LTS step by step.
Conclusion
So this is the way to install Visual Studio Code on Ubuntu 22.04 LTS. You can also install VSCode on other Debian-based distros like Debian, Kali Linux, MX Linux, etc.
If you have any questions, feel free to leave a comment.

